Forecasting
1) About
This guide will walk you through all necessary steps to configure sales forecasting in Weflow. If you have questions or concerns, don’t hesitate to contact our support team at support@getweflow.com.
Please note: Weflow cannot import historical activities from your Salesforce instance if field history tracking has not been enabled for custom fields.
2) General Information
Who needs to be involved?
- A Salesforce admin who can install a new managed package for all users.
- A RevOps/SalesOps person or someone who manages the forecasting process at your company.
What can be prepared in advance to save time?
- The managed package can be installed in advance by a Salesforce admin.
- To install the managed package, the Salesforce admin needs to sign in to Weflow and install it from here.
How long does it take?
The setup takes about 30 minutes. You can either do it by yourself, or partner with our Success Team to walk you through it.
3) Setup
Part 1: Install the Weflow Managed Package
The managed package ensures that Weflow can capture all field changes, updates, and new opportunities being created without relying on field history tracking. In addition, the managed package avoids making API calls - meaning Weflow is a lightweight solution and does not block other third-party integrations to Salesforce.
- Go to the admin console
- Select the forecast tab
- Click on 'Install' on the 'Weflow Managed Salesforce Package' container
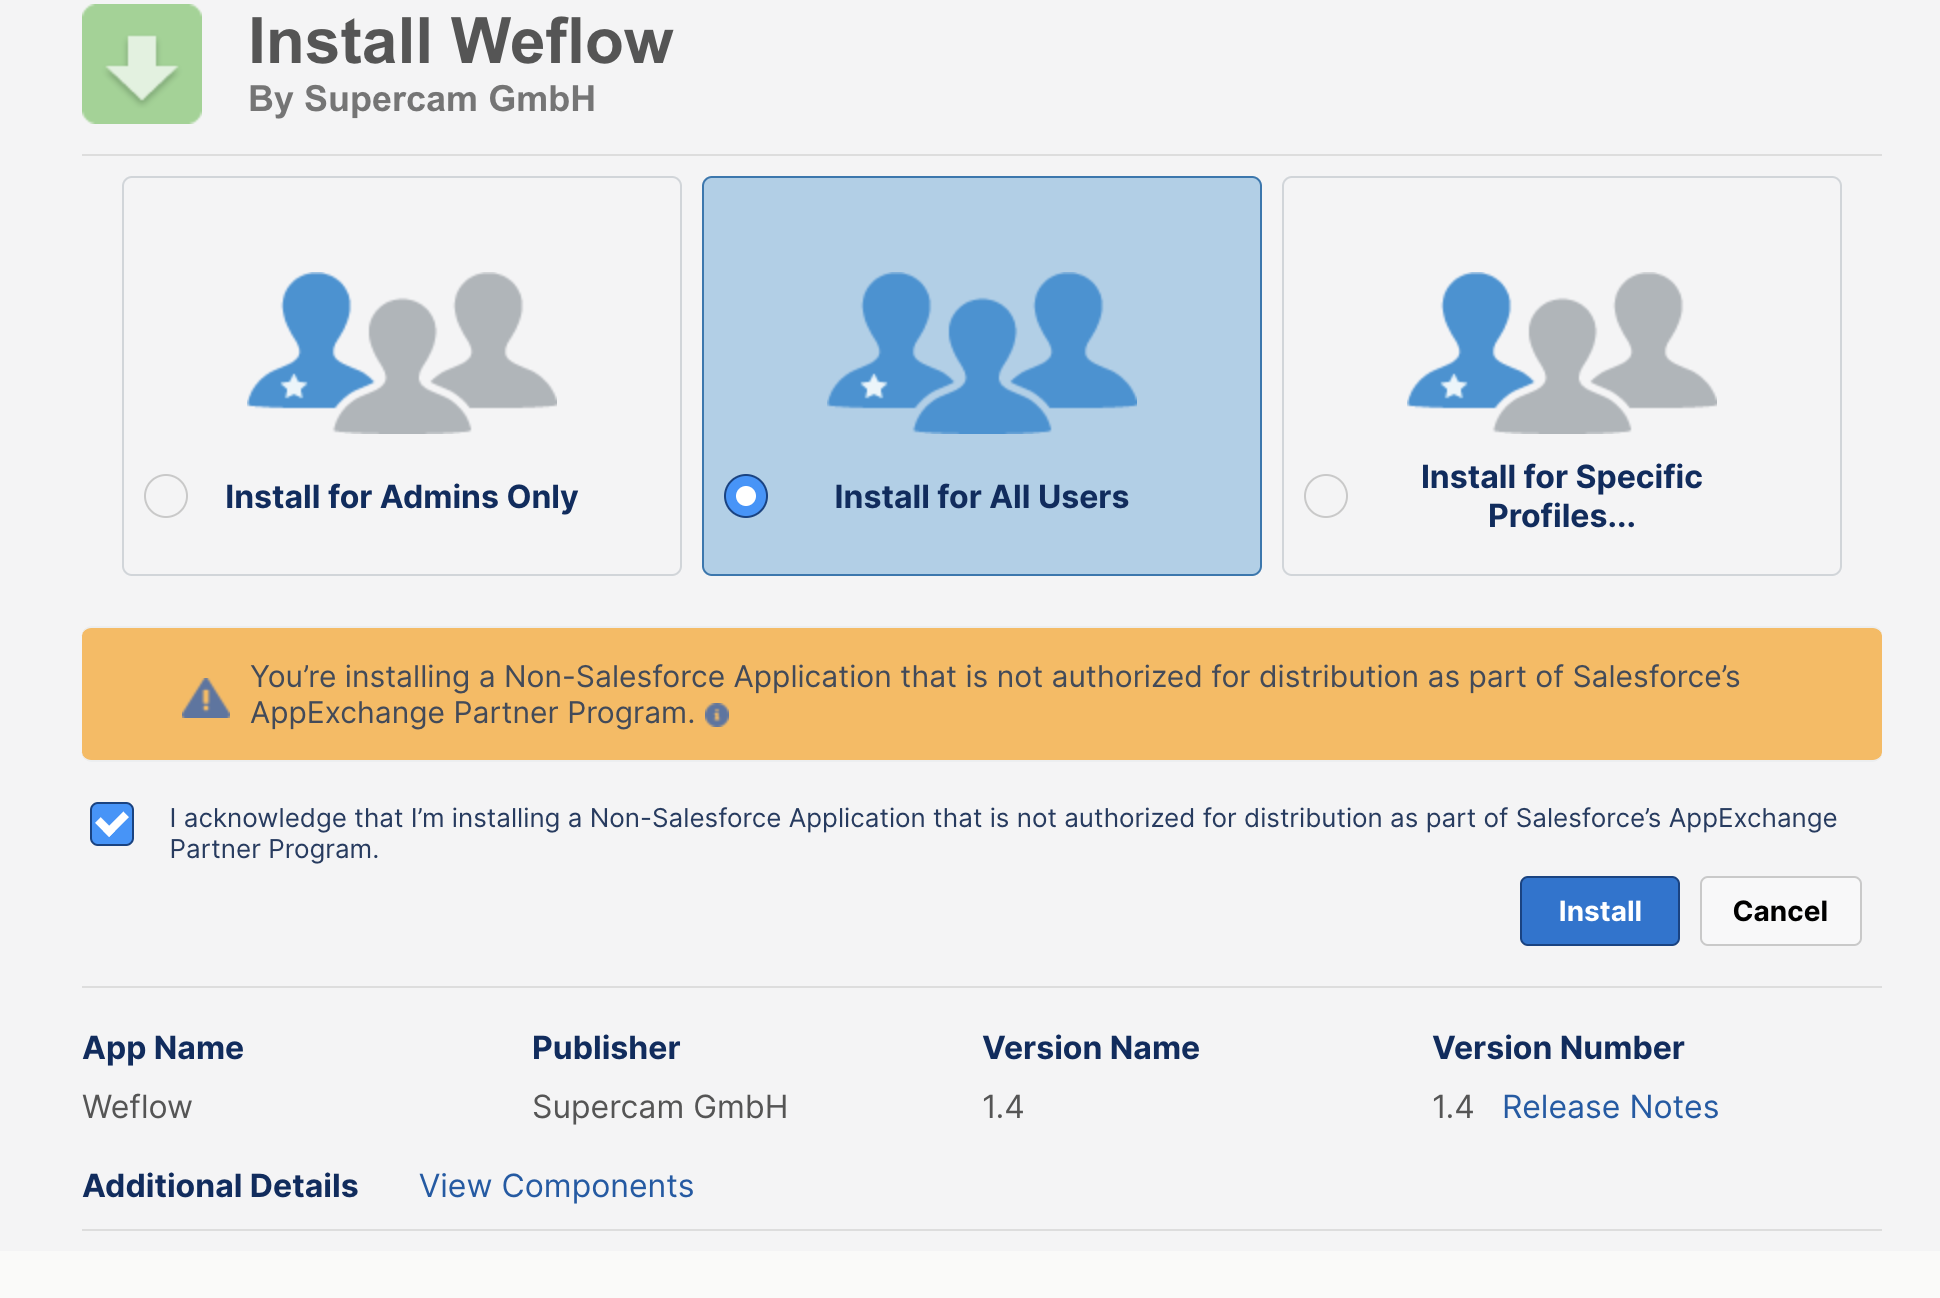
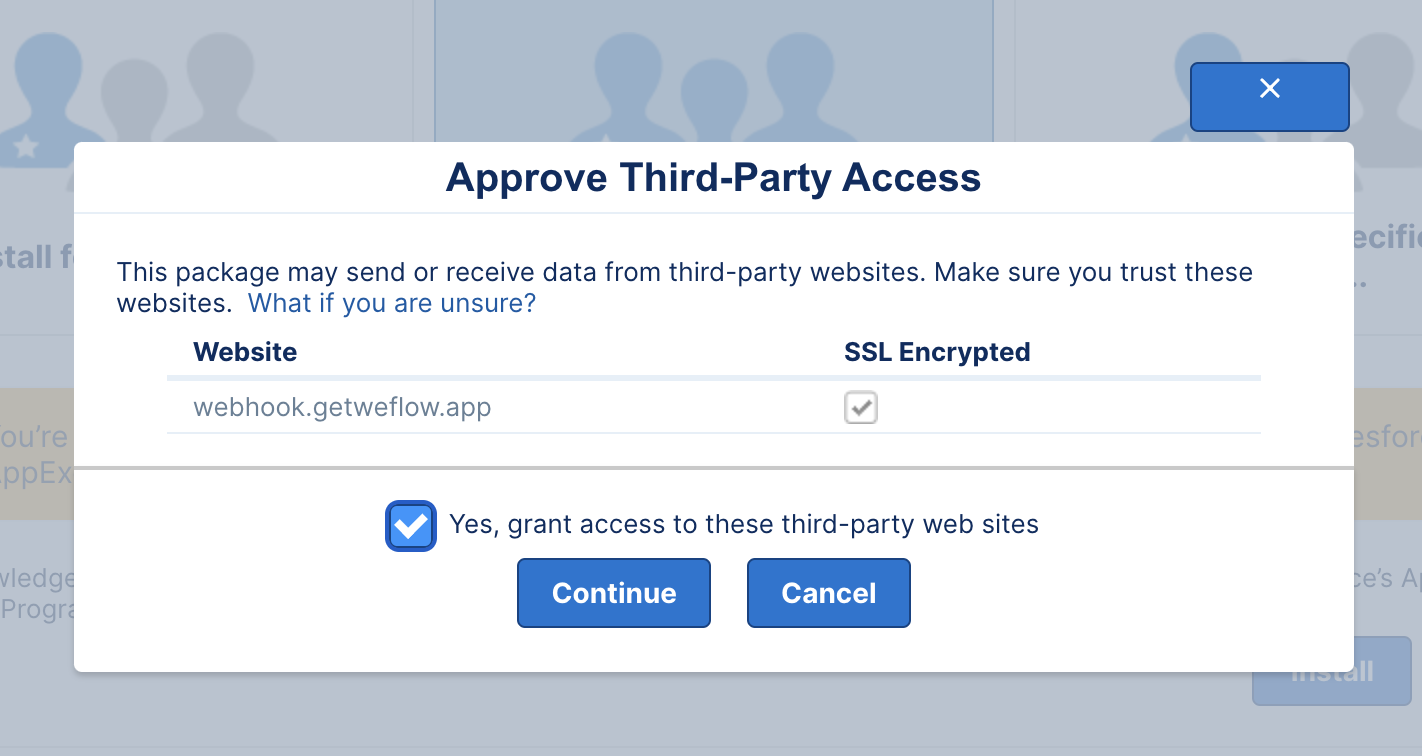
- Follow the steps as outlined below:
A) Install for "All Users" to avoid conflicts
The package needs to be installed so that all users have read and write access to WeflowCalendarEventData object and its relating custom fields.
B) Approve Third-Party Access
That's it. The whole installation should not take more than five minutes, depending on the size of your Salesforce instance.
Part 2: Configure default forecasting settings
- Go to the admin console
- Select the forecast tab
- Click on 'Create new forecast'
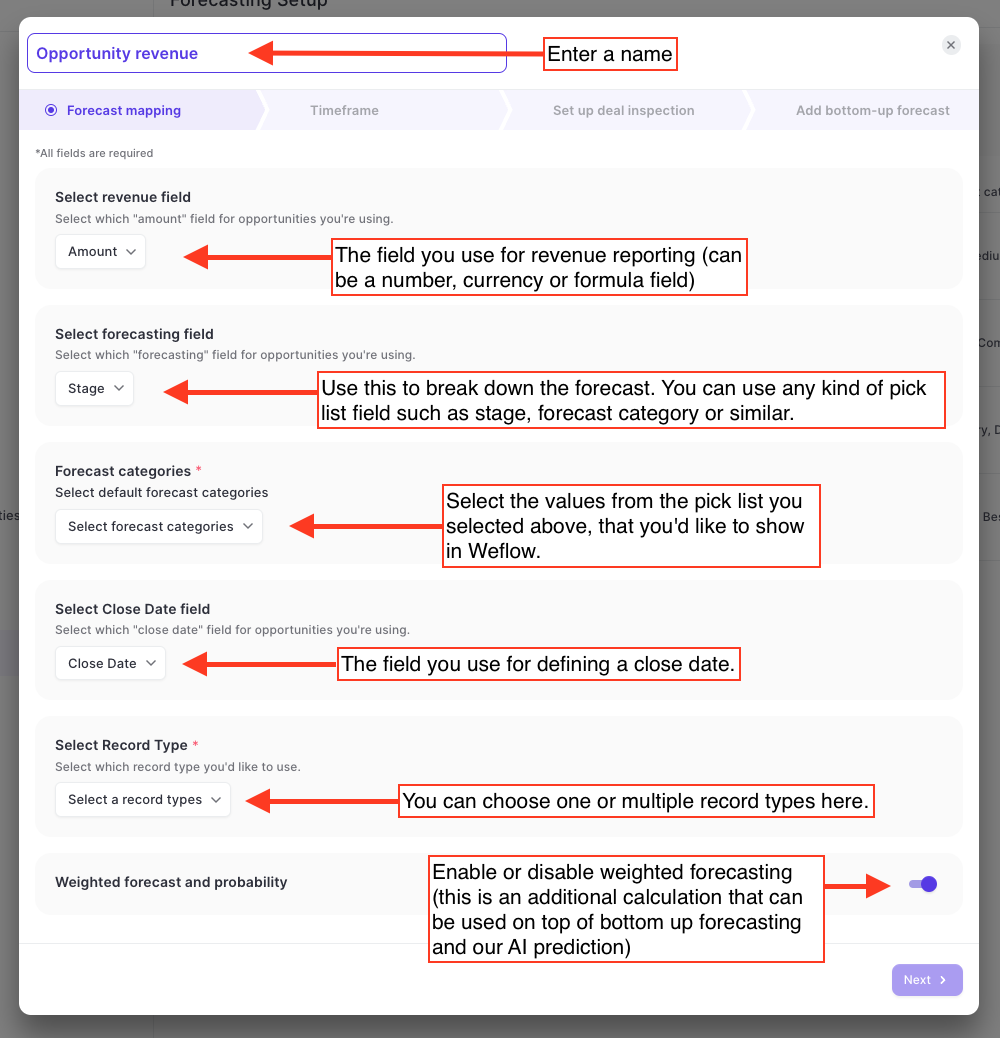
- Select a forecast category, revenue, and close date field
- Click 'Next'
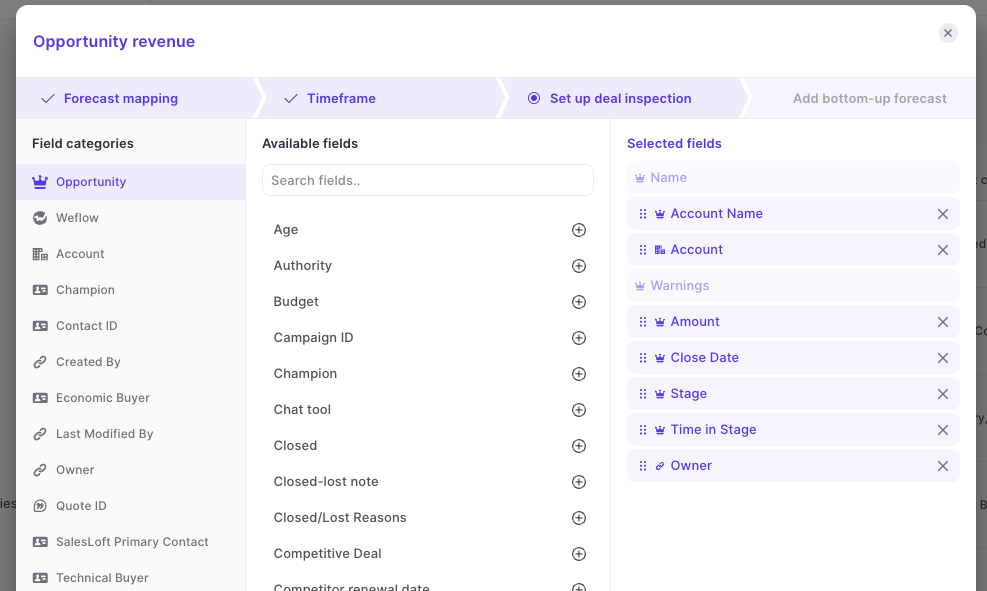
- Pick the fields you want to use for deal inspection
- Click 'Next'
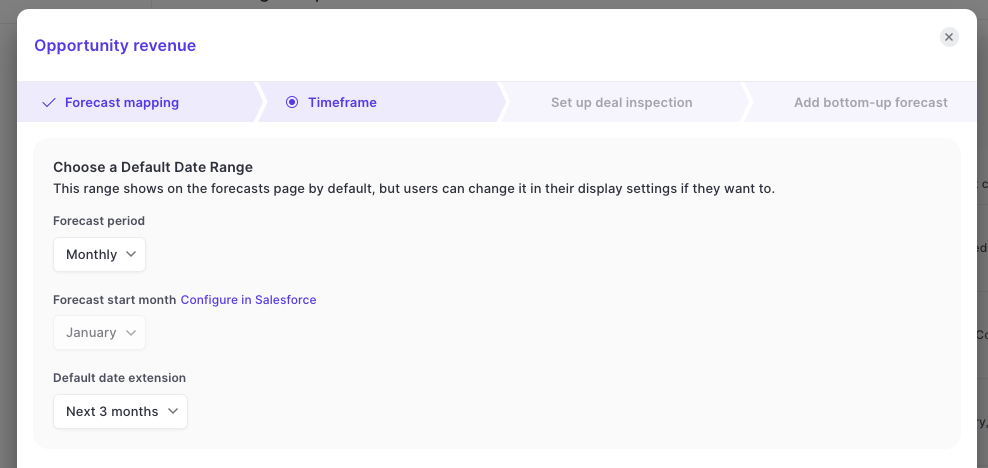
- Define default time ranges and customization options (make sure to pick the forecast categories you want to report on; you may need to scroll down for that)
- Click 'Save'
A) Options for field mapping
First, you need to map your respective forecasting fields to Salesforce. Weflow is flexible to fit to your specific needs. Keep in mind, that you can create multiple forecasts and toggle between them.
B) Define your forecasting period
- Next, you need to define how you want to forecast. We generally recommend monthly forecasting with weekly updates.
- The financial year will be retrieved directly from your Salesforce settings. Hence, you cannot change it here from Weflow, but need to configure it in Salesforce directly.
C) Choose fields to display during deal inspection
- In every forecast or pipeline analytics view, deals can be inspected in greater detail.
- Here, you can choose a pre-defined set of fields that will always be displayed.
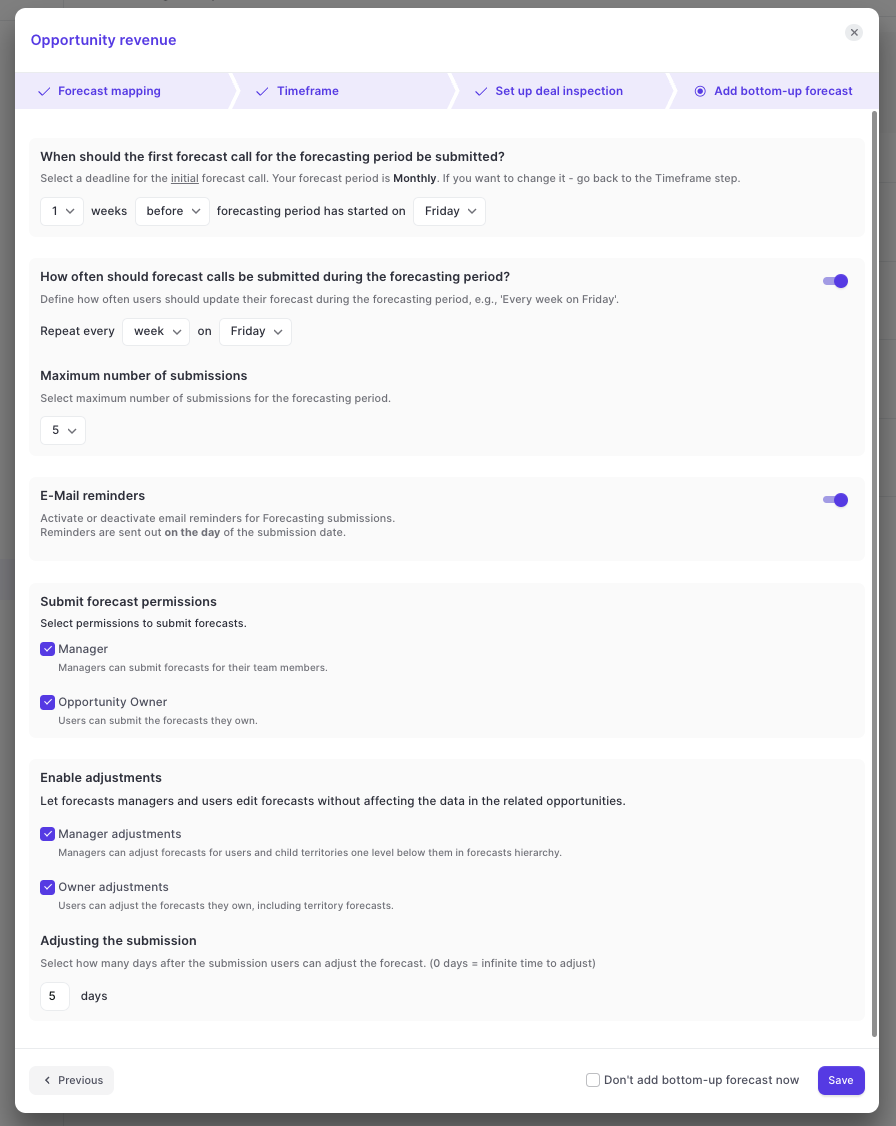
D) Add a bottom-up forecasting motion to your forecast
- In this next and final step, you can define a bottom-up forecasting motion.
- If you don't want to add a bottom-up forecast yet, simply add the checkbox at the bottom of the screen next to "Don't add bottom up forecast now".
Where are forecast calls submitted?
Once the forecast submissions have been enabled in the admin console, the Roll-Up tab becomes available.
- Users can submit forecasts up to 12 months into the future
- Users can look at their own submission history by clicking the 'View submission history' button
4) Invite Users
- Once you're done with the setup, add your sales teams to Weflow via the Member section or by sharing the sign-up link (they'll be added to your Weflow organization automatically based on their Salesforce Org ID).
5) Sandbox
- You can test Weflow's forecasting capabilities in a Sandbox environment via sandbox.getweflow.app.
- The sandbox environment is an exact copy of our production environment with a different underlying database.
- You can test everything in our sandbox environment, but to set it up in production, you must replicate the settings and go through the setup flow again.


